
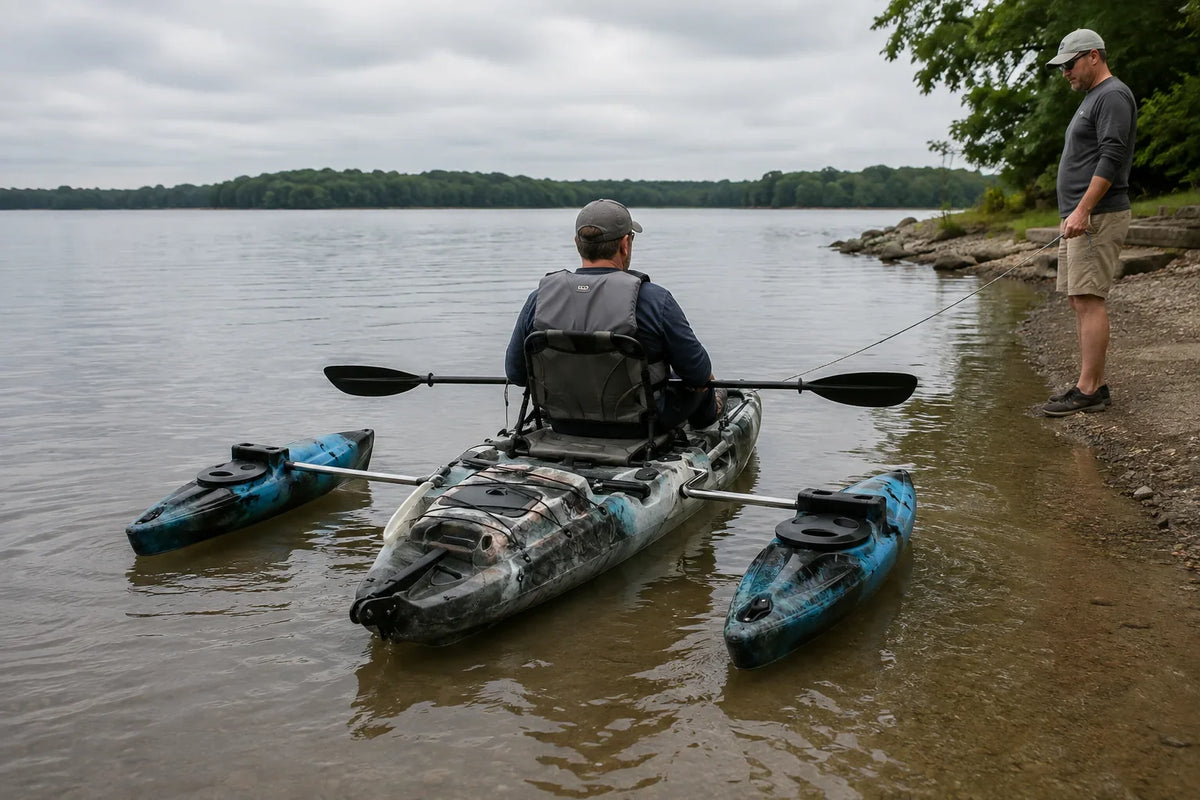
Cover image note: This AI-generated technical illustration depicts a controlled shallow-water kayak-outrigger check. It is not a customer trip photograph or proof of stability in other loads and conditions.
An outrigger can increase resistance to rolling once its float engages the water. It does not make a kayak uncapsizable, and it can introduce new problems: drag, asymmetry, snag points, greater beam and unfamiliar recovery behaviour.
Treat an outrigger as a system modification. Test it in controlled conditions before relying on it for fishing, photography, mobility support or rougher water.
What stability are you trying to change?
Initial stability is how steady the kayak feels near level. Secondary stability is its resistance and behaviour farther into a lean. A float mounted high may stay clear during normal paddling and engage later; a float set low may feel steadier immediately but create more drag and slap. Position also changes leverage on the crossbar and mounting points.
Measure the boat and the paddling stroke
- Record the mounting-area shape, thickness and access—not only the kayak's overall width.
- Check crossbar clearance over hatches, seat adjustments and deck rigging.
- Simulate a full paddle stroke on both sides. Hands, shaft and blade must clear the bars and floats.
- Check entry, exit, transport and rescue movements. The added beam must not block a dock ladder or roof-rack process.
- Confirm the assembled system cannot contact a rudder, pedal drive or fishing line.
AirowMarine's LLDPE outrigger kit is one adjustable form. Verify the current component dimensions, attachment method and operating instructions against the kayak in hand.
Symmetry matters
Measure each float from the kayak centerline and from a fixed fore-and-aft reference. Match height and angle. A system that looks symmetric in a photograph may not be symmetric under load if one mount sits on a curved or flexible surface.
After assembly on land, apply only the controlled checks permitted by the manufacturer. Watch the mounting surface for flex and the joints for rotation. Do not improvise a proof load.
A staged on-water test
- Wear an appropriate personal flotation device and use a calm, protected location with support nearby.
- Begin close to shore without extra fishing or camera gear.
- Paddle forward, reverse and turn on both sides. Note drag, paddle contact and weathercocking.
- Lean progressively within your training and comfort level to learn when each float engages.
- Practice the recovery and re-entry method appropriate to your craft and abilities. Determine whether the crossbar helps or obstructs it.
- Return to shore and inspect every connection before adding load or distance.
Environmental conditions, loading, fatigue and skill still control risk. The American Canoe Association's Smart Start for Safe Paddling program covers trip planning, hazards, weather and rescue priorities that remain relevant after an outrigger is fitted.
Before every departure
Check pins and retainers, fastener movement, crossbar locking, float damage, symmetry and interference with safety gear. Remove or secure loose fishing line. If a float is taking on water, a joint slips, or the mounting surface shows cracking, end the test and correct the cause.
Limit: An outrigger is not a substitute for a suitable craft, weather judgment, flotation equipment, training or a trip plan. It should be one tested part of the system, not the reason to enter conditions you would otherwise avoid.

Leave a comment
This site is protected by hCaptcha and the hCaptcha Privacy Policy and Terms of Service apply.